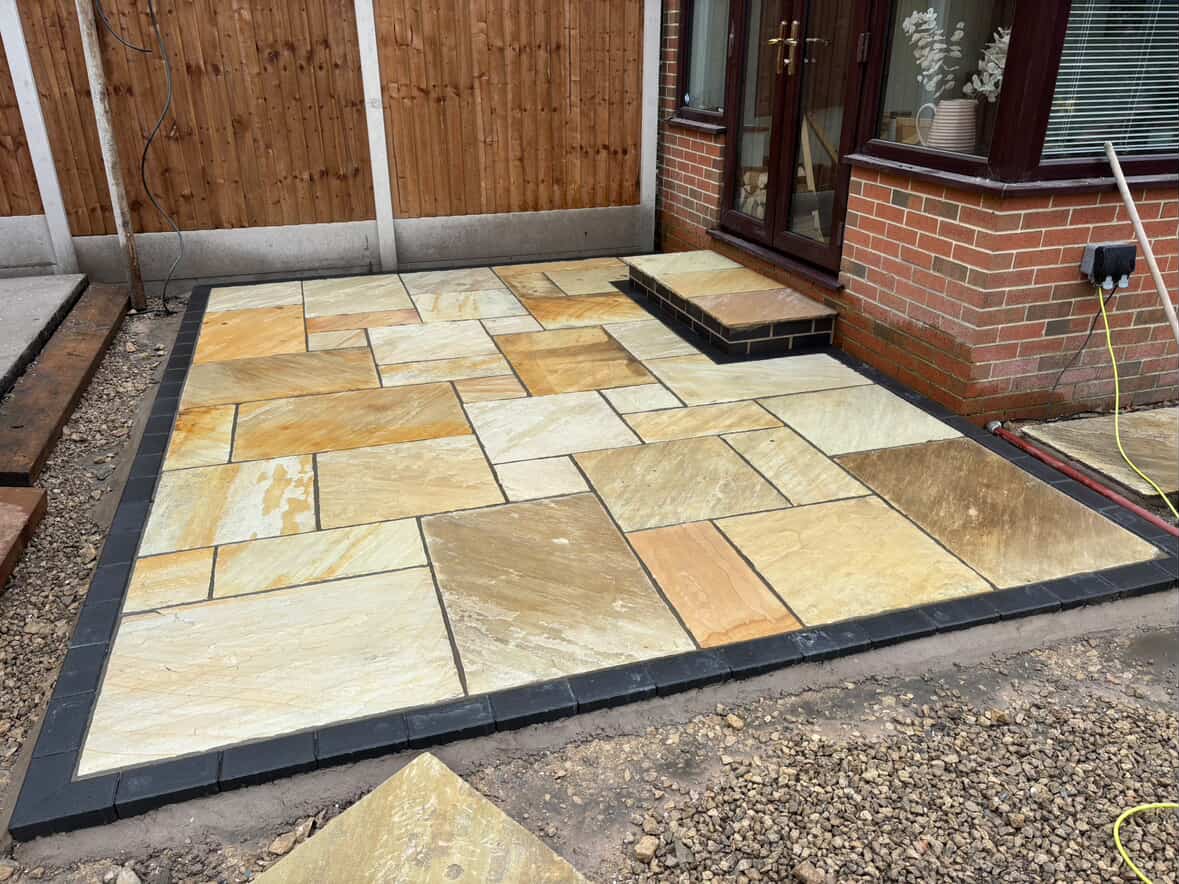
A sandstone patio that gets sealed every couple of years will still look good in twenty years. One that never gets touched goes green, picks up stains, and starts looking tired within a few winters. The job itself isn't hard. It's a weekend with the right products and, more than anything, a bit of patience waiting for the stone to dry.
This is the same process we use on our own jobs, written so you can do it yourself. If you'd rather hand it over, that's fine too, and there's a note at the end on when it's worth calling someone in.
Why sandstone needs it, and porcelain doesn't
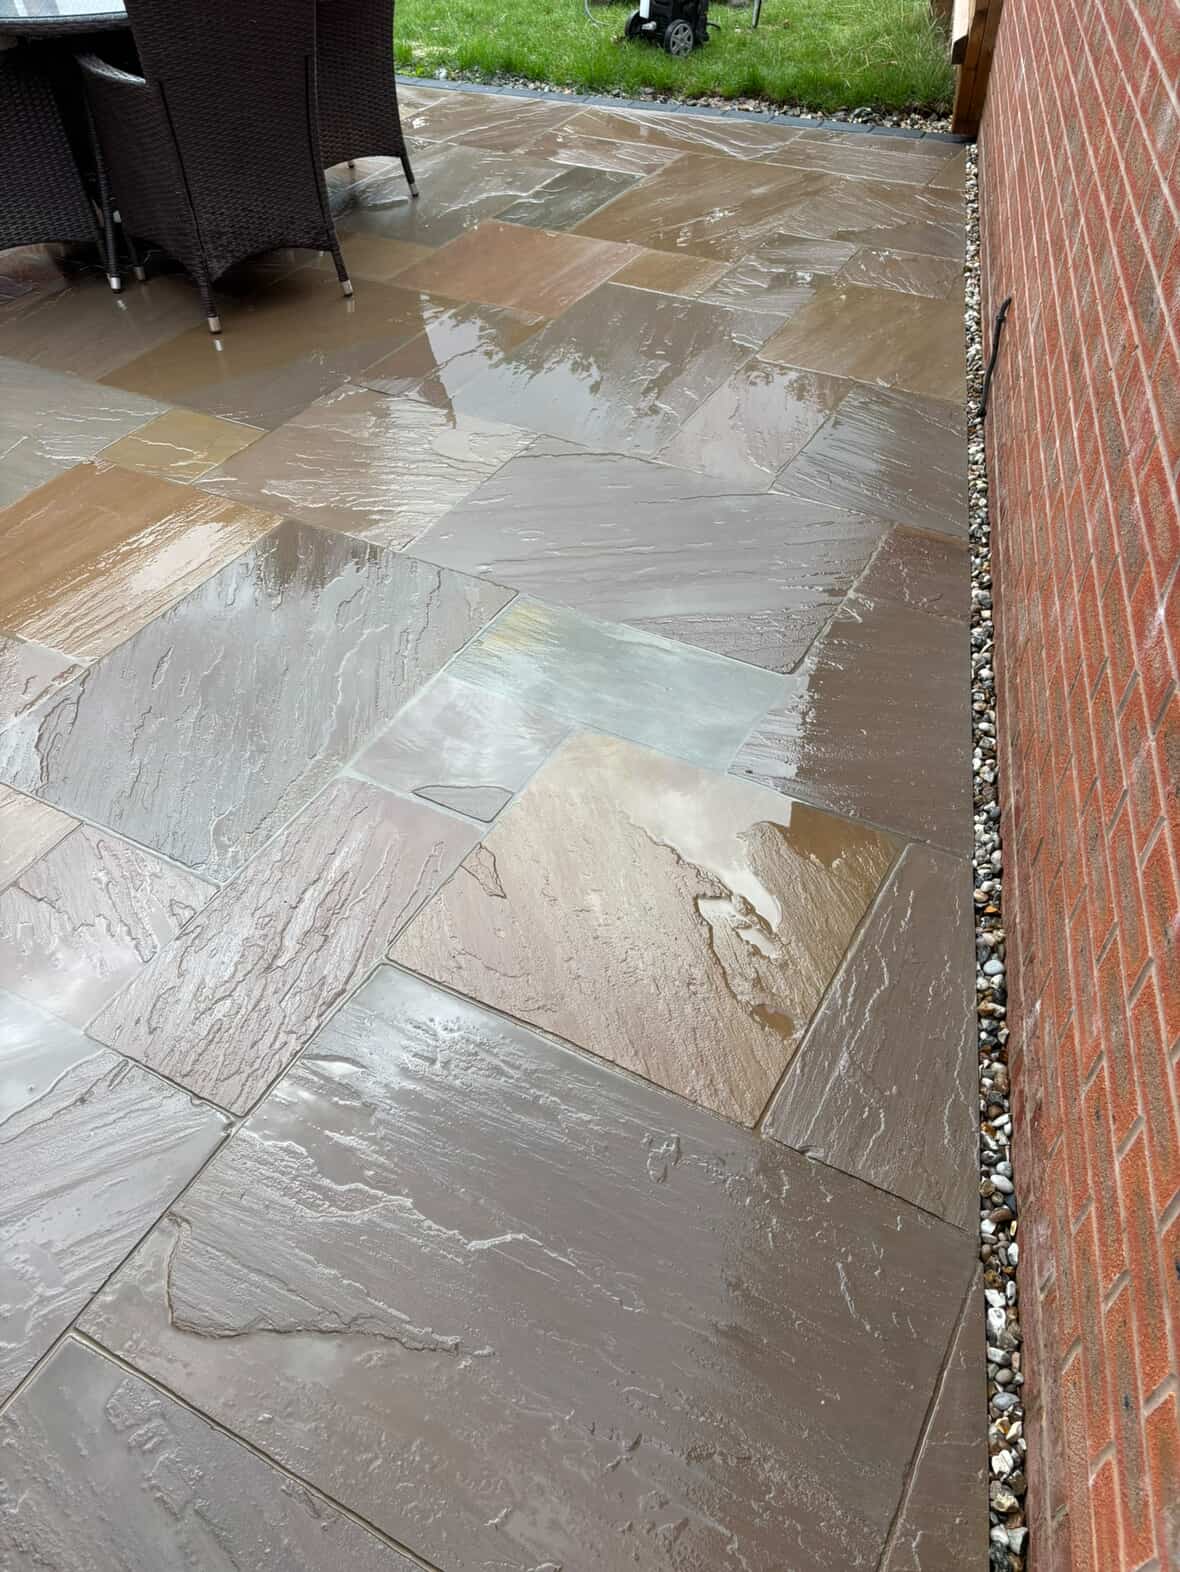
Indian sandstone is slightly porous. Water, and everything in it, soaks in. In the Derbyshire climate that means algae through the damp months, stains from leaves and spills, and, on unsealed stone, frost working into the surface over a few hard winters.
Sealing fills those pores so water sits on top instead of soaking in. It keeps the colour, slows down the green, and makes everyday cleaning a five-minute job. Porcelain doesn't need any of this because it barely absorbs water in the first place. If you've got sandstone, though, sealing is the single thing that keeps it looking the part.
When to do it
Pick a dry spell. Late spring or late summer tends to be the sweet spot in Derbyshire: warm enough for the stone to dry through, not so wet that you're fighting the forecast.
You need the slabs bone dry before sealing, and you want a couple of dry days after. Check the forecast and give yourself a clear window. Rushing this is the most common reason a seal fails.
What you'll need
- A stiff broom and a hand brush
- A patio or algae cleaner suitable for natural stone
- A pressure washer (optional, and used with care)
- Kiln-dried sand or a proper jointing compound for re-pointing
- A breathable, impregnating stone sealer
- A roller, brush or sprayer for the sealer
- A dry, clear weather window
Step 1: clear and sweep
Move the furniture and pots off, then sweep the whole patio. Get the loose dirt, leaves and any moss off the surface and out of the joints. Pull weeds from between the slabs while you're there. The cleaner the surface now, the better everything else works.
Step 2: treat the algae and moss
If the patio has gone green, hit it with a patio cleaner or algae treatment before you wash it. Follow the product's dwell time, usually leaving it to sit for a while so it actually kills the growth rather than just loosening the top layer. Skipping this means the green comes straight back.
Step 3: wash it down
Now wash the patio. A pressure washer is quickest, but it's also where people do the most damage. Keep the lance moving, hold it at an angle, and stay about 30cm off the surface. Held too close, a pressure washer strips soft sandstone and fires the jointing out from between the slabs.
If you'd rather not risk it, a stiff broom, the cleaning solution and some elbow grease will get there. It takes longer but it's gentler on the stone.
Step 4: let it dry properly
This is the step that makes or breaks the whole job, and it's the one everyone wants to skip.
The stone has to be completely dry before any sealer goes on, right through, not just on the surface. After a wash that usually means at least 24 to 48 hours of dry weather, sometimes longer if it's been damp. Seal over trapped moisture and you'll get a hazy, patchy finish that can flake off later. If in doubt, wait another day.
Step 5: re-point any open joints
Washing nearly always lifts some of the jointing. Before sealing, go round and top up any gaps with kiln-dried sand or a jointing compound. Solid joints stop weeds and water getting down between the slabs, and they make the finished patio look tidy. Let any wet jointing product cure as the instructions say before moving on.
Step 6: apply the sealer
Work in in sections on a dry, still day. Apply the sealer evenly with a roller, brush or sprayer, following the coverage on the tin. Most natural-stone sealers want two thin coats rather than one thick one, with drying time between them.
Don't flood it. Pooled sealer dries to a shiny, uneven patch that's a pain to fix. Thin and even wins. Keep off the patio until it's fully cured, which is usually a day, and keep furniture off a little longer.
How often to reseal
Every two to four years for most gardens. Sunny, free-draining patios last longer. Shaded or north-facing ones need doing more often.
The simple check: tip a little water onto a slab. If it beads and sits, the seal is still working. If it soaks straight in and the stone goes dark, you're due.
Mistakes we get called out to fix
A few keep coming up:
- Sealing damp stone, which leaves a milky haze across the slabs.
- Using a cheap gloss or wet-look sealer that traps moisture and flakes within a year.
- Getting too close with the pressure washer and wrecking the joints and the surface.
- Sealing a brand new patio before it's had time to cure.
Most of these mean stripping the bad sealer back and starting again, which is far more work than doing it properly the first time.
When to call someone in
If the patio is large, badly stained, lifting, or you simply don't fancy a weekend of it, it's a reasonable job to hand over. We clean and re-seal patios across Derby and Derbyshire, and we'll tell you honestly whether yours needs a full going-over or just a tidy-up.
Get a free quote or call Jamie on 07891 632305. If you're weighing up a new patio instead of reviving an old one, our guide to Indian sandstone vs porcelain is worth a read first.